Singer Sewing Machine User Manual: A Comprehensive Guide

Welcome! This detailed manual unlocks your Singer’s potential, offering guidance on operation, maintenance, and troubleshooting for optimal sewing experiences.
Congratulations on choosing a Singer sewing machine! This manual is your essential companion, designed to guide you through every step of using your new machine. We aim to provide a clear, comprehensive resource, ensuring a successful and enjoyable sewing journey. Discover all features and benefits, from basic stitching to advanced techniques.
Unboxing and Initial Setup
Carefully unpack your Singer machine and all included accessories. Verify all components are present. Position the machine on a stable, level surface with adequate space. Connect the power cord and ensure the power switch is off. Familiarize yourself with the machine’s basic layout before proceeding to threading and initial operation.
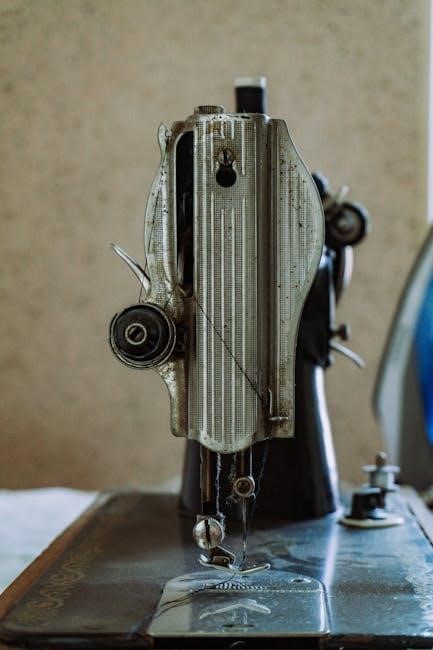
Machine Components Overview
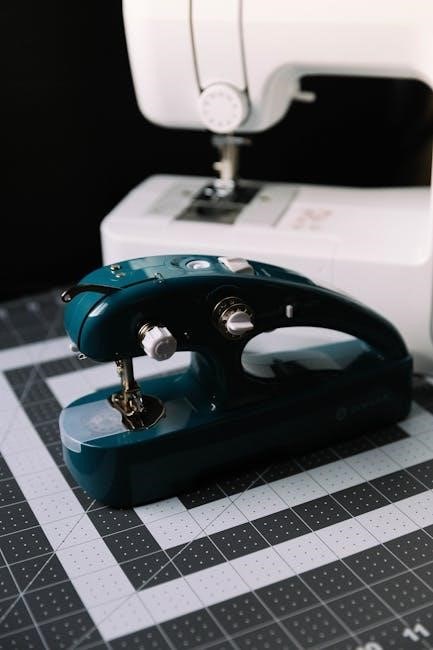
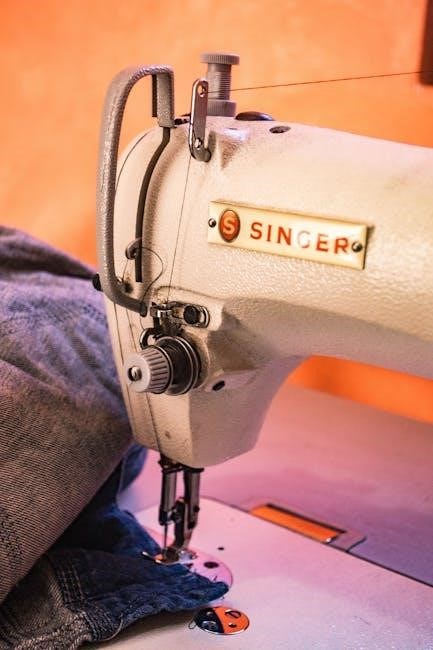
Your Singer sewing machine features several key parts working in harmony. These include the power switch, handwheel, bobbin winder, thread tension dial, stitch length and width controls, presser foot, and needle clamp. Understanding each component’s function is crucial for successful operation and maintenance of your machine.
Identifying Key Parts
Essential components include the needle, responsible for stitch formation, and the presser foot, which holds fabric in place. The feed dogs advance material, while the bobbin case houses the lower thread. Locate the tension discs, stitch selector, and handwheel – mastering these aids precise control and efficient sewing.
Understanding the Bobbin System
The bobbin system creates the interlocking stitches. Use compatible SINGER Class 15 bobbins for optimal performance. A bent, dull, or damaged bobbin can cause issues; discard and replace it. Ensure proper insertion and tension for smooth, even stitches, avoiding thread nests or looping.
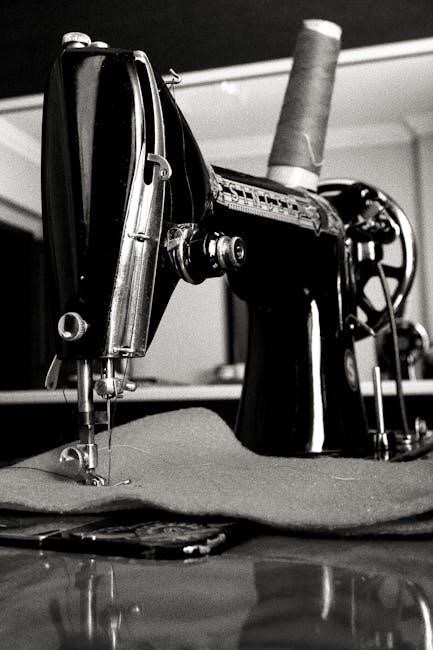
Threading the Machine
Correct threading is crucial for stitch formation. Follow the designated path meticulously, ensuring the thread engages all guides properly. If experiencing issues, completely rethread the machine. Avoid manually pulling or pushing fabric; let the feed teeth advance it smoothly for consistent results.

Upper Threading Guide
Begin by raising the presser foot. Guide the thread from the spool, through the first thread guide, and down into the tension discs. Ensure the thread is securely seated between them for proper tension. Continue following the numbered diagram, leading to the take-up lever and finally, the needle.
Lower Threading (Bobbin) Guide
After winding the bobbin, insert it into the bobbin case, ensuring it clicks into place. Guide the thread through the tension spring and then through the slot in the bobbin case. Finally, bring the thread up through the needle plate opening, ready for sewing.
Bobbin Winding
Proper bobbin winding is crucial for consistent stitch quality. Begin by placing the thread spool on the spool pin. Guide the thread through the thread guides and onto the bobbin. Engage the bobbin winding mechanism and gently press the foot pedal to wind evenly.
Preparing the Bobbin
Ensure you utilize bobbins specifically designed for your Singer machine – typically SINGER Class 15 transparent types. Inspect the bobbin for any bends, dullness, or damage; discard if found. Correct bobbin preparation prevents issues like uneven stitching and thread nests during sewing operations.
Winding the Bobbin Correctly
Proper bobbin winding is crucial for consistent stitch quality. Follow the machine’s diagram carefully, ensuring even distribution of thread. Avoid overfilling; a slightly less-full bobbin is preferable to a tightly packed one. Incorrect winding can lead to tension problems and skipped stitches during your sewing projects.
Needle Selection and Replacement
Choosing the correct needle is vital for successful sewing. Different fabrics require different needle types and sizes. A bent, dull, or damaged needle causes issues like skipped stitches. Always replace needles safely, discarding old ones responsibly. Refer to the manual for appropriate needle choices based on your fabric type.
Choosing the Right Needle for Your Fabric
Selecting the appropriate needle ensures optimal stitch quality and prevents fabric damage. Lightweight fabrics need finer needles, while heavier materials require robust ones. Wrong needle sizes can lead to skipped stitches or thread breakage. Consult your manual for a comprehensive guide matching needle types to specific fabric weights and weaves.
Replacing a Needle Safely
Always power off and unplug your Singer machine before changing the needle. A bent or damaged needle poses a safety risk. Gently loosen the needle clamp screw, remove the old needle, and insert a new one with the flat side facing the back. Tighten the screw securely to prevent accidents during operation.
Basic Stitching Techniques
Mastering fundamental stitches is key to successful sewing. Begin with the straight stitch for seams and general construction. Utilize the zigzag stitch for finishing raw edges and creating decorative elements. Avoid manually guiding the fabric; let the feed teeth advance it smoothly for consistent results.
Straight Stitching
The straight stitch forms the foundation of most sewing projects. Ensure correct threading and needle insertion for consistent results. Gently guide the fabric, allowing the feed dogs to move it evenly. Adjust stitch length based on fabric weight; shorter for delicate materials, longer for heavier ones.
Zigzag Stitching
The zigzag stitch offers versatility for finishing raw edges, creating decorative elements, and sewing stretch fabrics. Adjust stitch width and length to achieve desired effects. Wider stitches provide greater stretch recovery, while narrower stitches are ideal for appliqué. Practice on scrap fabric to master tension control.
Troubleshooting Common Issues
Encountering problems? This section addresses frequent concerns. Thread breakage can stem from incorrect threading, a bent needle, or improper tension. Skipped stitches often indicate a dull or incorrect needle size. Fabric feeding issues may arise from improper presser foot pressure or incorrect threading—re-thread completely!
Thread Breakage Problems
Frequent thread breaks suggest several potential causes. Ensure correct threading following the manual’s guide. A bent or damaged needle is a common culprit; replace it immediately. Verify you’re using the appropriate needle size for your fabric weight. Incorrect tension settings can also lead to breakage—adjust accordingly.
Skipped Stitches & Solutions
Skipped stitches often indicate a dull or damaged needle, requiring immediate replacement. Confirm the needle is correctly inserted and fully engaged. Using the wrong needle type for your fabric can also cause this issue; select the appropriate needle. Ensure proper threading, as incorrect threading is a frequent cause.
Fabric Feeding Issues
If fabric isn’t feeding smoothly, avoid manually pushing or pulling it – let the machine’s feed teeth do the work. Check the presser foot pressure; insufficient pressure can hinder feeding. Clean the feed dogs, removing any lint or debris. Ensure correct threading, as this impacts proper fabric movement.
Maintaining Your Singer Machine
Regular cleaning and oiling are crucial for longevity. Remove lint from the bobbin area and feed dogs frequently. A consistent maintenance schedule, including these steps, prevents issues. Use a soft brush and appropriate sewing machine oil. Proper care ensures smooth operation and extends the life of your Singer.
Cleaning and Oiling
Regularly remove lint with a brush, especially around the bobbin and feed teeth. Apply sewing machine oil to oiling points as indicated in your machine’s diagram. Avoid over-oiling! A clean machine operates smoothly and prevents fabric jams. This simple routine extends the lifespan of your Singer significantly.
Regular Maintenance Schedule
After every eight hours of use, clean the lint buildup. Oil the machine monthly, or more frequently with heavy use. Inspect the needle for damage before each project. A yearly professional servicing ensures optimal performance and identifies potential issues before they escalate, prolonging your Singer’s life.
Understanding Stitch Length and Width
Adjusting stitch length impacts fabric strength and appearance; shorter stitches for delicate fabrics, longer for heavier materials. Stitch width controls zigzag stitch breadth, influencing seam finishing and decorative effects. Experimentation is key to achieving desired results, ensuring proper tension and fabric compatibility for optimal stitch formation.
Adjusting Stitch Length
The stitch length dial controls the distance between each stitch. Lower numbers create shorter, tighter stitches ideal for delicate fabrics or basting. Higher numbers produce longer stitches suitable for heavier materials and quicker sewing. Always test on scrap fabric to ensure the chosen length suits your project’s needs.
Adjusting Stitch Width
The stitch width dial determines how wide your zigzag or decorative stitches will be. A smaller number creates a narrow stitch, while a larger number expands the width. Experiment with different widths on scrap fabric to achieve the desired effect for your project, ensuring proper fabric coverage and aesthetic appeal.
Presser Feet and Their Uses
Your Singer machine’s versatility expands with different presser feet! The standard foot handles everyday sewing. Specialty feet, like the zipper foot, navigate close seams with ease. Buttonhole feet automate buttonhole creation, while others tackle specific fabrics or techniques, enhancing precision and project outcomes.
Standard Presser Foot
The standard presser foot is your go-to for most general sewing tasks. It’s designed for straight and zigzag stitching on a wide variety of fabrics. Ensuring it’s securely attached is crucial for consistent fabric feed and stitch formation, providing a reliable base for all your projects.
Specialty Presser Feet (Zipper, Buttonhole, etc;)
Expand your sewing capabilities with specialty feet! Zipper feet facilitate close-stitch zipper application, while buttonhole feet automate precise buttonhole creation. Other options include blind hem, rolled hem, and gathering feet, each designed for specific techniques and enhancing project outcomes with professional results.
Safety Precautions
Prioritize safety during operation! Always disconnect the power before threading, changing needles, or performing maintenance. Avoid reaching near the needle while in motion to prevent injuries. Never manually force fabric; let the feed dogs guide it. Keep fingers away from all moving parts for secure sewing.
General Safety Guidelines
Ensure a stable work surface and adequate lighting. Never operate the machine if damaged. Keep the machine clean and free of debris. Supervise children when near the sewing machine. Disconnect power when not in use or servicing. Always use the correct needle and accessories for your project.
Avoiding Needle Injuries
Always disconnect power before changing the needle. Use needle insertion tools when possible. Never sew over pins or thick materials forcefully. Keep fingers away from the needle area during operation. Dispose of broken needles safely. A bent or dull needle increases risk; replace immediately.
Compatible Accessories
Enhance your sewing experience with recommended Singer accessories! These include various presser feet – zipper, buttonhole, and more – alongside bobbins (Class 15 style). Explore optional attachments for specialized tasks. Find these at authorized Singer retailers or online; ensure compatibility with your specific model.
Recommended Accessories
To maximize your Singer’s capabilities, consider a variety of presser feet! Zipper, buttonhole, and rolled hem feet expand project possibilities. Genuine Singer Class 15 bobbins ensure smooth operation. A needle assortment caters to diverse fabrics. These additions elevate precision and efficiency in your sewing endeavors.
Where to Purchase Accessories
Genuine Singer accessories are readily available at authorized Singer retailers, both online and in physical stores. Major craft stores, like Joann Fabrics, and online marketplaces such as Amazon also carry a wide selection. Ensure authenticity by purchasing from reputable sources to guarantee compatibility and quality for your machine.
Warranty Information
Your Singer sewing machine is covered by a limited warranty against defects in materials and workmanship. The warranty duration varies by model, typically ranging from one to ten years. Retain your proof of purchase for warranty claims. Detailed warranty terms and conditions are included with your machine.
Understanding Your Warranty
The Singer warranty covers defects arising from normal household use. It doesn’t cover damage from misuse, accidents, or unauthorized repairs. Modifications void the warranty. Keep the original packaging and receipt. Warranty service is provided through authorized Singer centers; contact customer support for locations and procedures.
Contacting Customer Support
For assistance with your Singer machine, visit the official Singer website for FAQs, troubleshooting guides, and contact information. You can typically find phone numbers and email addresses for regional support teams. Online chat support may also be available during business hours. Retain your model number for quicker service.