Important Safety Instructions
Always read the manual before use. Avoid modifications and wear protective gear. Operate on stable ground‚ never in wet conditions. Prevent battery exposure to water. Mow slopes carefully‚ never climb steep inclines. Ensure the mower is stable to avoid accidents. Keep children away while operating.
1.1 General Safety Precautions

Read and understand the manual before use. Always wear protective gear‚ including eye protection and sturdy footwear. Avoid operating the mower in wet conditions or on uneven terrain. Never modify the appliance or battery. Keep children and pets away during operation. Avoid mowing near drop-offs‚ ditches‚ or embankments. Do not operate under the influence of drugs‚ alcohol‚ or medication. Ensure the mower is stable and balanced before use. Regularly inspect for damage and follow manufacturer guidelines for maintenance. Properly store the battery and keep it away from water. Always follow safety guidelines for handling electrical components.
1.2 Safety Symbols and Their Meanings
The HART 40V mower manual uses specific safety symbols to indicate potential hazards. The DANGER symbol signals situations that could result in death or serious injury. WARNING indicates hazards that may cause death or injury. CAUTION alerts users to minor injury risks or property damage. The NOTICE symbol provides important information unrelated to safety. Understand these symbols to ensure safe operation. Familiarize yourself with each symbol’s meaning to avoid accidents and properly handle the mower and its components.
1.3 Emergency Procedures
In case of an emergency‚ stop the mower immediately and disconnect the battery. If abnormal vibration occurs‚ turn off the motor and inspect for damage. For battery leaks‚ avoid skin contact and rinse with water. Do not operate the mower near water or in wet conditions. If the mower tips over‚ turn it off and ensure it is stable before restarting. Always follow proper shutdown procedures to prevent accidents. Keep emergency contacts handy and refer to the manual for detailed instructions.

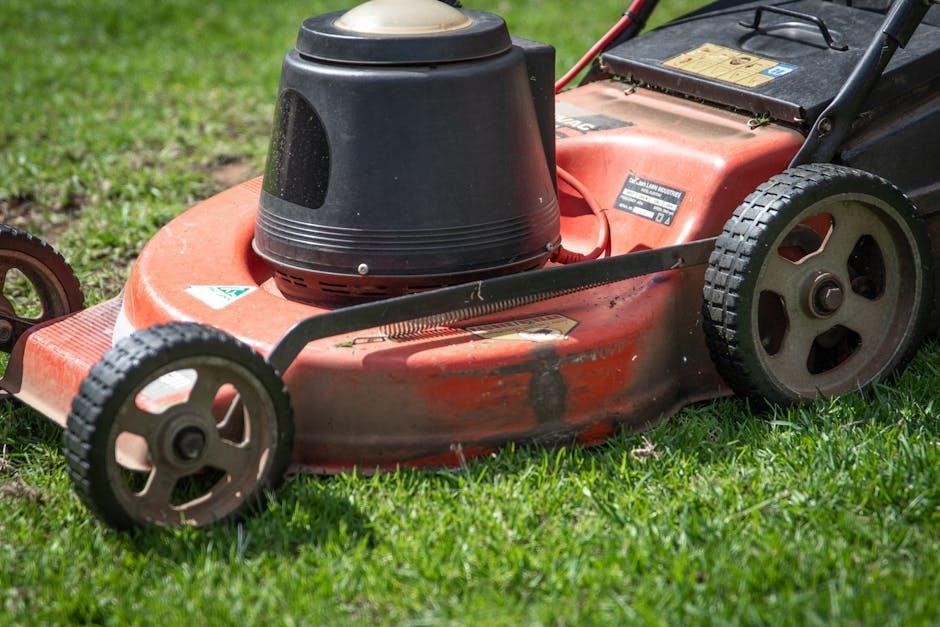
Key Features of the HART 40V Mower
The HART 40V Mower features a powerful 40V battery system‚ adaptive self-propelled technology‚ and a tilt sensor for enhanced safety and performance.
2.1 40V Battery System
The HART 40V Mower is powered by a high-performance 40V lithium-ion battery‚ designed for reliable energy delivery and extended runtime. It ensures consistent cutting power and supports multiple HART 40V tools for versatility. The battery is built for durability‚ with safety features like overcharge protection and thermal monitoring. Always follow charging guidelines in the manual to maintain battery health. Proper disposal is required‚ adhering to local regulations for lithium-ion batteries. The system provides efficient energy use‚ reducing environmental impact while delivering robust performance for your lawn care needs.
2.2 Adaptive Self-Propelled Feature
The HART 40V Mower features an adaptive self-propelled system that adjusts its speed based on your walking pace‚ ensuring effortless mowing. This feature allows the mower to move forward automatically‚ reducing physical effort. It is designed to work seamlessly in forward motion only and should not be pulled backward. The adaptive technology enhances mowing efficiency and comfort‚ making it ideal for various lawn sizes. Always ensure the feature is engaged correctly for optimal performance and energy efficiency. This innovative design reduces user fatigue and provides a smooth mowing experience.
2.3 Tilt Sensor Technology
The HART 40V Mower is equipped with tilt sensor technology‚ enhancing safety by preventing operation in unstable positions. This advanced feature automatically disables the mower if it tilts beyond a 45-degree angle or is placed vertically. The sensor ensures the blade stops immediately‚ reducing the risk of accidents. It also prevents accidental start-ups when the mower is not properly positioned. This technology provides peace of mind during use‚ especially on uneven terrain‚ by ensuring the mower operates safely and efficiently. Regular checks of the sensor are recommended for optimal functionality.
Assembly and Setup
Assemble the mower by unfolding and adjusting the handle‚ then installing the grass catcher. Secure all components firmly to ensure stability and proper function during use.

3.1 Unfolding and Adjusting the Handle
Unfold the handle and adjust it to your preferred height using the adjustment knob. Ensure the handle is securely locked to prevent movement during use. The handle should be at chest height for comfortable operation. Avoid allowing the starter cable to become pinched or trapped when raising the handle. After adjusting‚ tighten the knob firmly to maintain stability. Always remove the start key and battery pack before making any adjustments to ensure safety.
3.2 Installing the Grass Catcher
To install the grass catcher‚ first remove the start key and battery pack for safety. Place the grass catcher over the rear discharge opening‚ ensuring the metal locks align with the slots on the mower. Secure it by pushing down until it clicks into place. Make sure the catcher is properly seated to prevent debris from escaping. Avoid modifying the catcher‚ as this may reduce its effectiveness. Regularly inspect the catcher for wear and tear‚ and replace it if damaged to maintain optimal performance.
3.3 Handle Adjustment Knob
The handle adjustment knob is located on the upper handle and allows you to customize the height for comfortable operation. To adjust‚ turn the knob counterclockwise to loosen‚ then move the handle to your desired position. Align the handle’s pre-drilled holes with the pins on the mower frame. Once set‚ tighten the knob clockwise until secure. Ensure the handle is firmly locked to prevent movement during use. This feature ensures optimal ergonomics and ease of maneuverability while mowing.
Operation
Insert the start key and squeeze the start levers to begin. Use the adaptive self-propelled feature for ease. Mow slopes carefully‚ moving across‚ not up. Adjust modes for optimal cutting.
4.1 Starting the Mower
To start the mower‚ insert the start key into the designated slot. Squeeze the start levers located on the handle to activate the blades. The self-propelled feature will begin once the levers are held. Ensure the mower is on a flat surface and the area is clear. Always maintain control of the handle. Avoid leaving the mower unattended while it is in operation. Refer to the manual for detailed startup procedures.
4.2 Mowing Techniques on Slopes
Always mow across slopes‚ never up and down‚ to maintain stability. Avoid mowing near drop-offs or embankments. Use extreme caution when changing direction on slopes. Ensure the mower is balanced and adjust your pace accordingly. If the terrain is uneven‚ consider lowering the blade height slightly. Keep a firm grip on the handle to maintain control. Do not rely solely on the self-propelled feature; use manual pushing if necessary. Always prioritize safety and avoid risky maneuvers that could lead to accidents.
4.3 Using Different Mowing Modes
The HART 40V mower offers multiple mowing modes‚ including bagging‚ mulching‚ and rear discharge. For bagging‚ ensure the grass catcher is securely attached. For mulching‚ remove the catcher and install the mulch plug. Rear discharge is ideal for larger areas‚ allowing clippings to scatter. Adjust modes based on lawn conditions and desired results. Always ensure the correct mode is engaged before starting. Regularly clean the discharge chute to maintain efficiency. Follow manufacturer guidelines for mode switching to optimize performance and prevent clogging.
Maintenance
Regularly sharpen or replace the blade to maintain cutting efficiency. Clean debris from the mower deck and wheels. Store the mower in a dry place‚ protecting the battery from extreme temperatures. Charge the battery according to the manual’s guidelines to prolong lifespan. Inspect and replace worn parts promptly to ensure optimal performance.
5.1 Blade Care and Replacement
Regularly inspect the blade for wear or damage. Clean debris using a wire brush and sharpen as needed to maintain cutting efficiency. Replace the blade if it becomes uneven or damaged. Remove the battery before servicing. Tighten the blade bolt to the specified torque to ensure safety and performance. Store the mower with the blade in a dry‚ protected area during off-season. Always use genuine HART replacement parts for optimal performance and longevity of your mower.
5.2 Battery Maintenance Tips
Avoid exposing the battery to extreme temperatures or moisture. Always charge the battery fully before long-term storage‚ especially during winter. Check the charge level regularly and clean terminals for optimal performance. Store batteries in a cool‚ dry place away from children. Use only genuine HART chargers to prevent damage. Never over-discharge the battery or allow it to deep cycle. Replace the battery if it shows signs of swelling or reduced capacity. Proper maintenance ensures longevity and reliable performance of your HART 40V mower.
5.3 Seasonal Storage Guidelines
Store the mower in a cool‚ dry place away from direct sunlight and moisture. Clean the mower thoroughly before storage to prevent rust and corrosion. Remove and store the battery separately‚ ensuring it is fully charged. Protect the blades by applying a light coat of oil. Keep the mower in a horizontal position to maintain balance and prevent damage. Store the grass catcher and other accessories in a dry location. Regular seasonal storage ensures your HART 40V mower remains in optimal condition for future use.

Troubleshooting Common Issues
Address abnormal vibration by checking blade balance. Resolve battery issues by charging fully. For cutting difficulty‚ ensure blade sharpness and proper height adjustment.
6.1 Abnormal Vibration
If the mower experiences abnormal vibration‚ stop operation immediately. Check for uneven blade wear or damage. Ensure the blade is properly balanced and securely attached. Clear any debris obstructing the blade or mower deck. Vibration may also occur due to loose parts; tighten all bolts and screws. If issues persist‚ replace the blade or consult an authorized service center for professional assistance.
6.2 Battery Performance Problems
If the battery isn’t performing well‚ ensure it’s fully charged and not left discharged for extended periods. Avoid over-discharging‚ as it may reduce battery life. Check for loose connections or damage to the battery or charger. Clean the terminals if corroded. Store the battery in a cool‚ dry place during off-seasons. If issues persist‚ reference the manual or contact HART support for assistance or replacement options.
6.3 Difficulty in Cutting
If the mower struggles to cut evenly‚ check the blade for wear or damage and ensure it’s properly balanced. Verify that the mowing height is set appropriately for the grass type. Clean the underside of the mower deck to remove any debris. Ensure the grass catcher is securely attached and not full‚ as this can restrict airflow. If using mulching mode‚ confirm the mulching plug is correctly installed. For persistent issues‚ consult the manual or contact HART support for further troubleshooting or maintenance guidance.
Parts and Service
Identify replacement parts using your mower’s model number. Contact HART customer support for assistance or visit authorized service centers for genuine parts and expert repairs.
7.1 Identifying Replacement Parts
To identify replacement parts for your HART 40V mower‚ refer to the model number listed in the operator’s manual or on the product label. Visit the HART website or authorized retailers to search for compatible parts by model number. Ensure accuracy by cross-referencing part numbers with the manual or product specifications. For assistance‚ contact HART customer support or visit an authorized service center for genuine replacement components.
7.2 Contacting HART Customer Support
For assistance with your HART 40V mower‚ visit the official HART website at https://www.hartconsumerproducts.com/support. Use the “Contact Us” section to submit inquiries or call their customer service at the number provided. You can also reach out via email or live chat for prompt support; Ensure to have your product model number ready for efficient assistance. For localized help‚ visit authorized service centers listed on the HART website.
7.3 Authorized Service Centers
For professional repair and maintenance‚ visit an authorized HART service center. These centers are equipped with genuine parts and trained technicians to ensure optimal service. To locate the nearest center‚ visit the HART website at https://www.hartconsumerproducts.com/support and use the “Service Locator” tool. Only authorized centers guarantee compliance with HART’s quality standards‚ ensuring your mower remains in peak condition. Always verify the center’s authorization before scheduling service to avoid unauthorized repairs.