Welcome to the Lil Sew and Sew Manual! This comprehensive guide is designed to help you master the basics and beyond of sewing with ease. Perfect for beginners and experienced sewists alike, this manual covers everything from setup to advanced techniques, ensuring you gain confidence and skills to create stunning projects. Let’s get started on this exciting sewing journey together!
1.1 Overview of the Lil Sew and Sew Machine
The Lil Sew and Sew Machine is a versatile, portable sewing solution designed for crafters of all skill levels. Its lightweight design and user-friendly interface make it ideal for beginners and experienced sewists alike. With a range of stitch options and adjustable settings, this machine is perfect for both simple repairs and creative projects. Easy to use and durable, it’s a great tool for anyone looking to bring their sewing ideas to life. Sewing just got a whole lot easier!
1.2 Importance of the Manual for Beginners
The Lil Sew and Sew Manual is an essential guide for newcomers to sewing. It provides clear, step-by-step instructions to help beginners understand the machine’s features and operation. By following the manual, users can master basic techniques, troubleshoot common issues, and build confidence in their sewing skills. This resource ensures a smooth learning curve, making it easier to transition from simple tasks to more complex projects. It’s your go-to companion for unlocking the full potential of your Lil Sew and Sew Machine and creating beautiful, professional-quality stitches from day one.
Understanding the Components of the Lil Sew and Sew
Understanding the components of the Lil Sew and Sew is crucial for effective operation. Familiarizing yourself with the machine’s parts ensures proper use and easier troubleshooting. This section provides a clear overview of the machine’s essential elements, helping you identify and utilize each part confidently.
2.1 Identifying the Key Parts of the Machine
Welcome to Section 2.1 of the Lil Sew and Sew Manual! Here, we’ll explore the essential components of your machine. Start by locating the spool pins, bobbin area, and stitch selector. The tension dials, foot pedal, and power switch are also vital. Understanding these parts is key to proper setup, troubleshooting, and maintenance. Take your time to familiarize yourself with each element—this knowledge will enhance your sewing experience and help you make the most of your machine. Happy sewing!
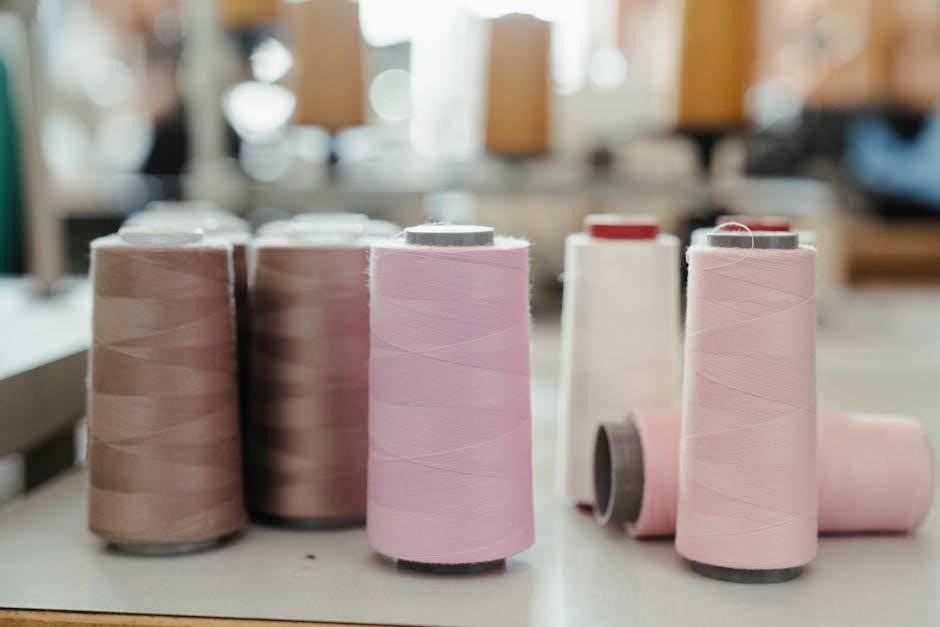
2.2 Accessories Included with the Lil Sew and Sew
Your Lil Sew and Sew comes with a variety of helpful accessories to enhance your sewing experience. Inside the box, you’ll find additional needles, bobbins, and a seam ripper for quick corrections. Also included are different presser feet, such as the zigzag and zipper foot, allowing you to tackle various projects with ease. These accessories ensure versatility and convenience, making your sewing journey more enjoyable and efficient. Explore them to unlock your machine’s full potential!
Setting Up Your Lil Sew and Sew Machine
Setting up your Lil Sew and Sew Machine is the first step to a seamless sewing experience. Start by unpacking and organizing all components. Ensure your workspace is stable and well-lit. Follow the manual’s guidance to assemble and position the machine correctly. Before use, double-check that all parts are securely attached and aligned. This initial setup will lay the foundation for smooth and efficient sewing sessions ahead.
3.1 Preparing the Workspace
Preparing your workspace is essential for a smooth sewing experience. Start by clearing a stable, flat surface and ensuring good lighting. Cover the area with a protective cloth or mat to prevent damage. Organize your tools, fabrics, and accessories within easy reach. Keep the machine’s power cord away from fabric to avoid tangling. Ensure proper ventilation and ergonomic positioning to maintain comfort during extended sewing sessions. A well-prepared workspace promotes efficiency and creativity.
3.2 Step-by-Step Assembly and Placement
Begin by carefully unpacking the Lil Sew and Sew machine and its accessories. Place the machine on a stable, flat surface, ensuring proper alignment. Attach any additional components, such as the sewing table or spool holders, following the manual’s instructions. Secure all parts tightly to prevent movement during use. Double-check that all elements are correctly fitted before powering on. Proper assembly ensures safe and effective operation, allowing you to focus on your sewing projects with confidence.
Threading and Tension Adjustment
Proper threading and tension adjustment are essential for smooth sewing. Correctly guiding the thread through the machine and balancing tension ensures even stitches and prevents common issues.
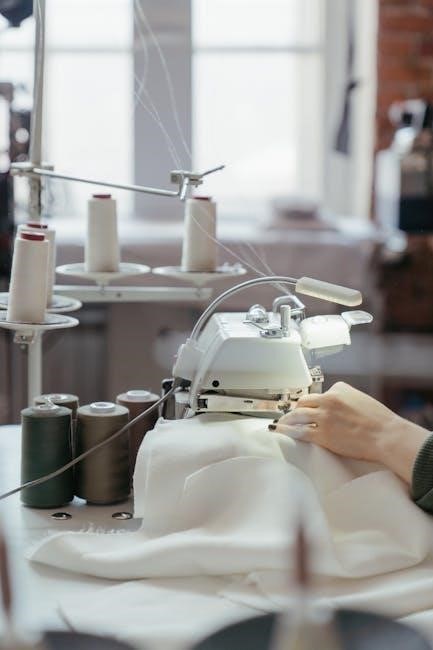
4.1 Proper Threading Techniques
Start by turning off the machine and locating the spool pin. Gently guide the thread through the tension discs, take-up lever, and finally, the needle. Ensure the thread is taut but not overly tight. Use the needle threader for ease. Always follow the threading path indicated in your manual to avoid misalignment. Proper threading ensures consistent stitch quality and prevents thread breakage during sewing. Test the thread tension by gently pulling it before starting your project.
4.2 Adjusting Tension for Optimal Sewing
Proper tension ensures even stitches and prevents fabric puckering or thread breakage. Start by threading the machine correctly. Adjust the tension discs by turning the small dials—loosen for thicker fabrics and tighten for delicate materials. Test the tension by sewing a straight line on scrap fabric. If the stitches are uneven, tweak the tension slightly and retest. Refer to your manual for specific dial positions and guidelines. Balanced tension is key for professional-looking results.
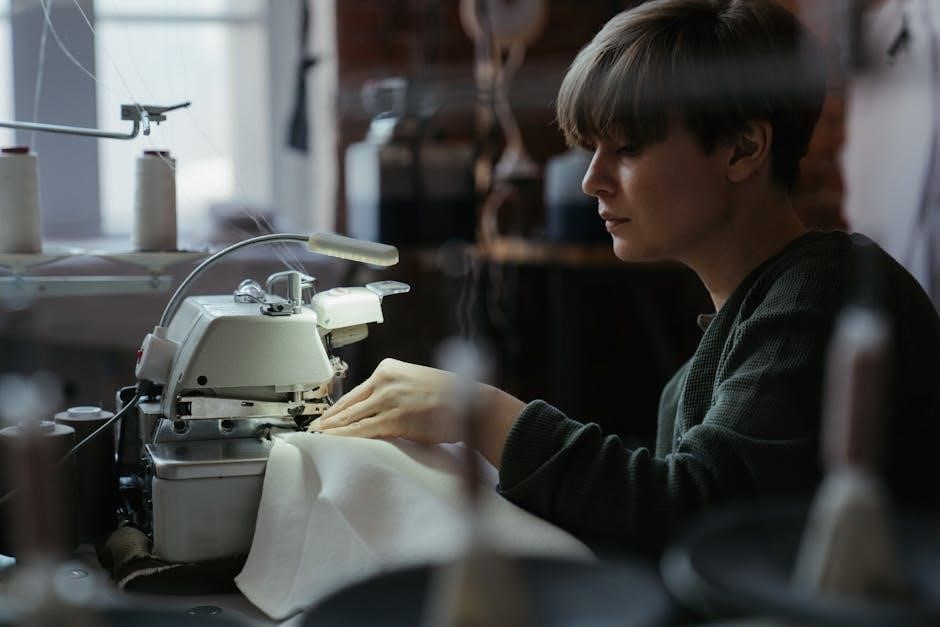
Basic Sewing Techniques
Master the fundamentals of sewing with confidence. Learn essential techniques like straight stitching, backstitching, and constructing strong seams. Practice even stitching and fabric handling for professional-quality results.
5.1 Straight Stitch and Basic Seam Construction
Mastering the straight stitch is the foundation of sewing. It’s ideal for joining fabrics evenly and creating clean, professional seams. To begin, align fabric edges precisely, ensuring a consistent 1/4-inch seam allowance. Guide the fabric smoothly under the presser foot, maintaining steady tension. Once sewn, press the seam flat to set the stitches. This technique ensures durability and a polished finish, making it essential for all sewing projects. Practice makes perfect!
5.2 Backstitching and Securing Seams
Backstitching is essential for securing seams, ensuring they remain strong and durable. Start by sewing forward a few stitches, then reverse for 2-3 stitches to lock the thread. This technique prevents unraveling, especially at seam ends. Always backstitch at the beginning and end of your stitching for added stability. Proper backstitching enhances the longevity of your projects and maintains a professional finish, making it a crucial step in every sewing task.
Troubleshooting Common Issues
Troubleshooting common issues with your Lil Sew and Sew machine is straightforward. This section helps identify and resolve problems, ensuring smooth and efficient sewing sessions.
6.1 Identifying and Fixing Thread Breakage
Thread breakage is a common issue that can disrupt your sewing flow. It often occurs due to incorrect tension, improper threading, or using low-quality thread. To fix this, check the tension settings, ensure the thread is properly seated in the machine’s guides, and replace worn-out needles. Using high-quality thread and keeping the machine clean can prevent frequent breakage. Regular maintenance and correct threading techniques will help minimize this issue.
- Check thread tension settings.
- Ensure proper threading path.
- Replace damaged or dull needles.
- Use high-quality thread.
6.2 Solving Jamming and Machine Hesitation
Jamming or hesitation in your Lil Sew and Sew machine can be frustrating but is often easy to resolve. Common causes include tangled threads, incorrect fabric alignment, or debris buildup. Turn off the machine, gently remove the fabric, and clear any thread tangles. Check for bent or damaged needles and replace them if necessary. Ensure the machine is well-lubricated and free from dust. Proper maintenance and regular cleaning can prevent such issues from recurring.
- Turn off the machine and remove fabric carefully.
- Check and clear any thread tangles or knots.
- Inspect and replace damaged or bent needles.
- Clean and lubricate the machine regularly.
Advanced Sewing Tips and Tricks
Elevate your sewing skills with expert techniques! Explore custom stitching, intricate patterns, and specialized fabrics. Discover how to enhance your projects with precision and creativity effortlessly.
- Experiment with decorative stitches for unique designs.
- Use specialized feet for precise fabric handling.
- Master techniques like gathering, ruching, and quilting.
- Incorporate advanced seam finishes for professional results.
7.1 Customizing Stitches and Patterns
Unleash your creativity by customizing stitches and patterns on your Lil Sew and Sew machine. With adjustable stitch length, width, and decorative options, you can tailor your projects to perfection. Use the built-in stitch selector to explore various styles, from straight and zigzag to intricate embroidery designs. Combine patterns or create your own for unique results. Experimenting with these features allows you to add personal touches to garments, home decor, and crafts, making every creation truly one-of-a-kind.
- Adjust stitch length and width for specific fabrics.
- Combine built-in patterns for intricate designs.
- Use the LCD screen to preview and select stitches.
- Experiment with decorative stitching for embellishments.
7.2 Sewing with Different Fabrics and Materials
Explore the versatility of your Lil Sew and Sew machine by working with various fabrics and materials. From delicate silks to heavy canvas, the machine adapts seamlessly. Use the appropriate needle type and thread to ensure smooth sewing. Adjust stitch settings for thickness and texture; For stretchy fabrics, opt for a zigzag stitch, while leather or vinyl may require a walking foot. Experiment with unique materials like fleece or sequined fabric to expand your creative possibilities.
- Choose the right needle for fabric type.
- Adjust tension and stitch length for thickness.
- Use a walking foot for heavy or layered materials.
- Test settings on scrap fabric before sewing.
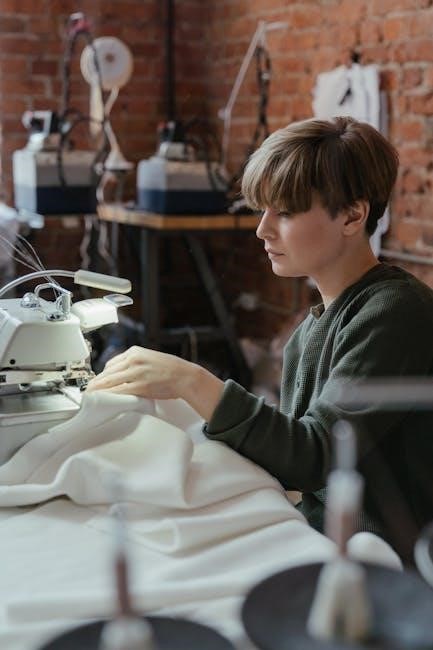
Maintenance and Care
Welcome to Maintenance and Care! Regular maintenance keeps your Lil Sew and Sew machine running smoothly and prolongs its lifespan. Learn essential cleaning and care tips here.
8.1 Cleaning and Lubricating the Machine
Regular cleaning and lubrication are essential for maintaining your Lil Sew and Sew machine. Turn it off, unplug it, and remove any debris with a soft brush or lint remover. Use a cotton swab to gently clean hard-to-reach areas. Apply a few drops of sewing machine oil to moving parts, following the manual’s guidelines. Allow the machine to sit for a few minutes before testing on scrap fabric. Proper care ensures smooth operation and prevents damage.
8.2 Regular Maintenance for Longevity
Regular maintenance ensures your Lil Sew and Sew machine runs efficiently and lasts longer. Schedule annual professional servicing to inspect internal mechanisms. Check and replace worn parts promptly, such as needles and bobbin cases. Store the machine in a dry, cool place to prevent rust. Dust and lint buildup can be prevented with a breathable cover. Consistent care will keep your machine performing optimally for years of reliable sewing.
Congratulations! You’ve completed the Lil Sew and Sew Manual. Now equipped with essential skills, embrace your creativity and confidently tackle new sewing projects. Happy sewing!
9.1 Summary of Key Takeaways
Through this manual, you’ve learned to set up, thread, and maintain your Lil Sew and Sew machine. You’ve mastered basic stitches, troubleshooting, and advanced techniques. Understanding machine components, proper tension adjustment, and fabric handling are now part of your skill set. With practice, you’ll continue to refine your sewing skills, creating beautiful and durable projects with confidence. Sewing is a journey, and this manual has provided a solid foundation for your creative adventures.
9.2 Encouragement for Further Sewing Exploration
Congratulations on completing the Lil Sew and Sew Manual! You’ve gained a strong foundation to explore the world of sewing. Don’t stop here—experiment with new fabrics, patterns, and techniques to expand your creativity. Sewing is a lifelong skill that brings joy and accomplishment. Keep practicing, and soon you’ll create beautiful, professional-looking projects. Join sewing communities, share your work, and inspire others. Happy sewing, and remember, every stitch tells a story!